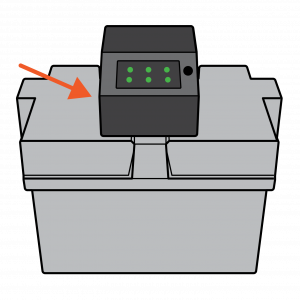
WiFi Battery Backup Troubleshooting
Quick tips:
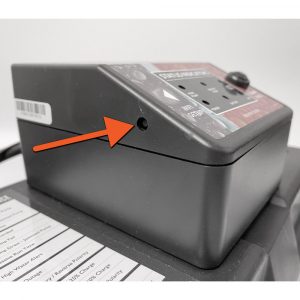
Location of the WiFi set up button:
The WiFi set up button can be found on the left side of the control unit. It is a small recessed button and does not require much pressure to push.
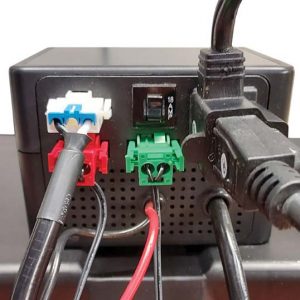
Proper controller connections:
Refer to the image above. Make sure the backup pump, float switches, and primary pump are connected to the back of the WiFi controller.
TROUBLESHOOTING
Issue: Unable to connect to the “PumpSpy” WiFi network when WiFi provisioning with an iOS device.
Resolution: Uninstall and reinstall the App by using the following steps:
Step1: Open Settings
Step 2: Tap General
Step 3: Tap iPhone Storage
Step 4: Tap the App you want to delete
Step 5: Scroll down and delete the App
Step 6: Reinstall the App
Make sure your WiFi device is in provisioning mode (WiFi LED is Amber) and begin the setup process. When prompted to connect to a Local Network you must say YES. (It may take more than 1 attempt to delete the App as you need to make sure you are prompted to connect to a Local Network).
Issue: WiFi provisioning with an Android device with Android 12 causes an error when attempting to connect to the “PumpSpy” WiFi network.
Resolution: Connect the device manually using a computer’s web browser.
Manual Setup Instructions on Computer:
1. Locate and press the provisioning button on your WiFi enabled device for 3 seconds.
Note: The WiFi LED should turn amber in color. If you hold this button longer than 5 seconds and the LED has not turned amber in color, disconnect the device from all electrical connections for 2 minutes. Once reconnected, press and hold the provisioning button for 3 seconds.
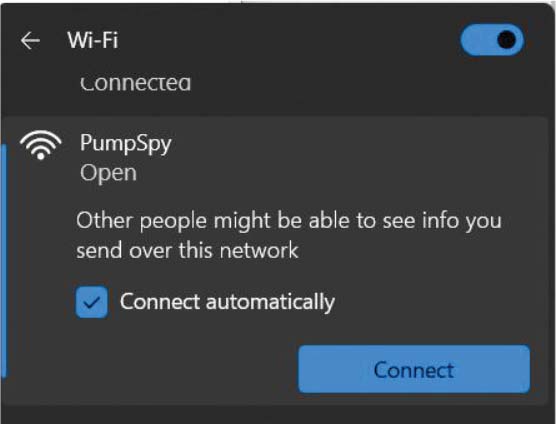
2. While the WiFi LED is amber, on your computer go to the WiFi settings and look for the PumpSpy WiFi connection. Connect to this WiFi network.
3. Once connected to this network, open your internet browser and type in the following address.
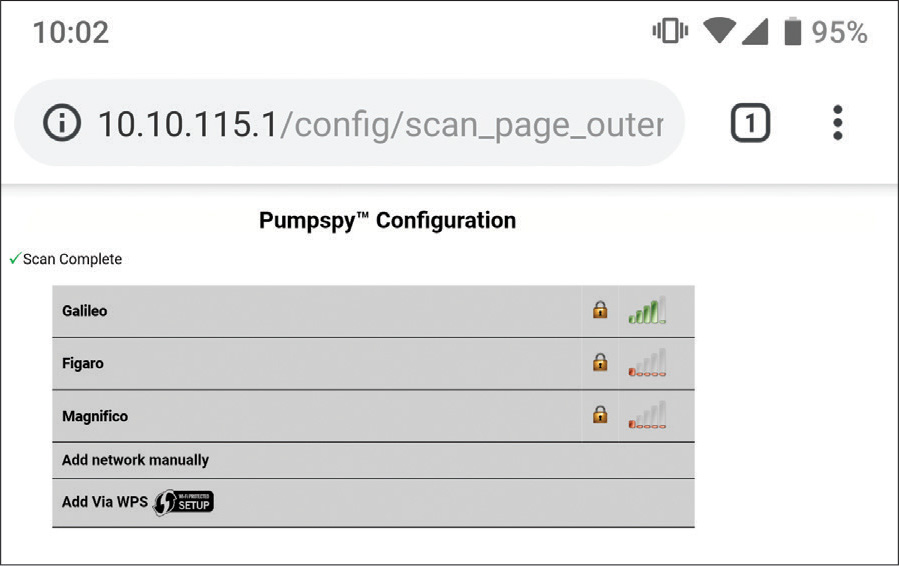
10.10.115.1/config/scan_page_outer.html
A page will open that looks like this.
Select your home network.
Enter your network password.
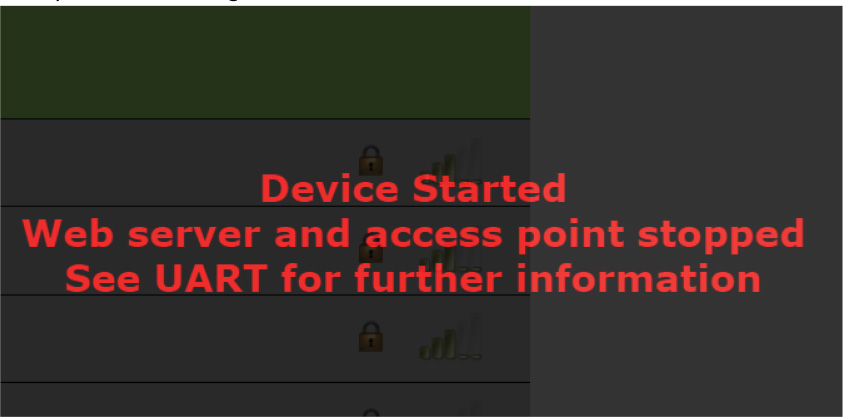
Once you see the message “Device started. Web server and access point stopped. See UART for further information,” Technical Support (1-833-786-7779) can connect the device to your account.
When you call Technical Support at 1-833-786-7779, please have the 15-digit device ID number from the side of the unit available for the technical support representative.
4. Open the App and verify that the WiFi unit is present on your device.
Issue: WiFi provisioning with an Android device with Android 11 causes an error when attempting to connect to the “PumpSpy” WiFi network.
Resolution: Connect the device manually.
Manual Setup Instructions on a Mobile Device:
If you are having issues with setting up the WiFi Connected Sump Pump via the App, you can set it up manually with your mobile device.
This process works on all Apple and Android devices.
• On your Apple/Android device, go to WiFi settings and connect to the PumpSpy WiFi network
• If your mobile device warns you that there is no internet connection available, that is normal. Stay connected to the PumpSpy WiFi network
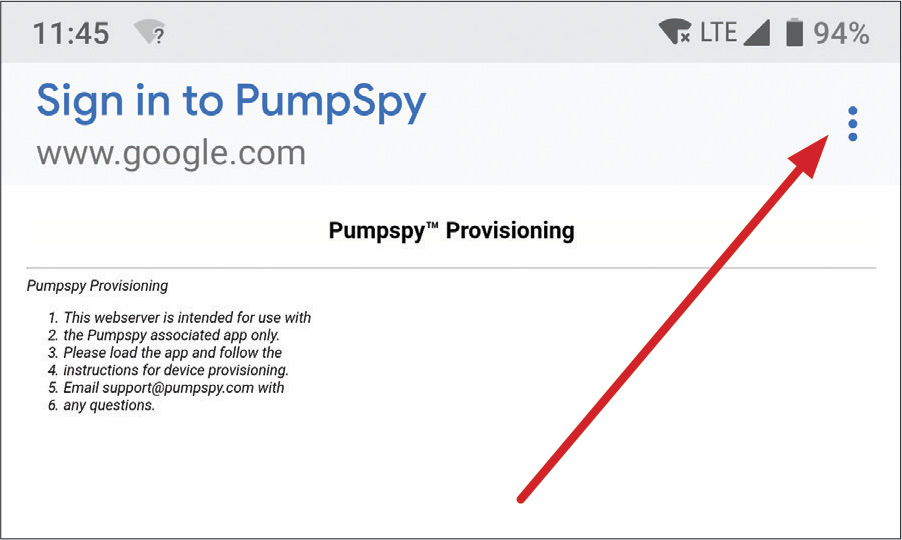
• Some Android devices will request that you sign in to the PumpSpy network. In this event, click the sign in notification. When you reach the PumpSpy Provisioning page, select options (3 dots) at upper right, then select “Use this network as is.”
Once successfully connected, open a web browser on your Apple/Android device
• Enter the following address: 10.10.115.1/config/scan_page_outer.html
• Select your WiFi network from the displayed list of available networks
• Enter your network password
• The screen will go dark and a message will be displayed. Close your browser.
• Your WiFi Connected Sump Pump’s WiFi indicator LED will turn red for several seconds, then green once successfully connected to the monitoring servers. If it stays red after 60 seconds, start over. (Make sure you enter the correct WiFi password!)
• Once the WiFi LED indicator is green, open the App and select “Connect Device Manually”
• Enter your device’s 15-digit serial number and press “Submit”
Issue: Able to connect to the “PumpSpy” WiFi network but unable to connect to home WiFi.
Probable Cause: WiFi signal strength is too weak.
Resolution: Move the router or use a WiFi extender to strengthen the WiFi connection.
– AND/OR –
Probable Cause: The WiFi router is blocking the “PumpSpy” WiFi network.
Resolution: Access the router table and “white list” the “PumpSpy” WiFi network.
The top 3 Internet service providers and instructions to access the router table are below.
AT&T
From your mobile device’s web browser go to http://att.wirelessinternet. Enter your Admin login, then click login.
UNBLOCK A DEVICE: From the Blocked WiFi device(s) panel, click the Unblock Access checkbox next to the desired device. Click Apply when finished.
Click OK.
Spectrum
Log in to the web-based interface of the router. Refer to router manufacturer instructions if needed.
Go to Advanced > Security > Access Control.
Enable Access Control.
Select the access mode to either block (recommended) or allow the device(s) in the list.
Xfinity
Go to the Connect section in the Xfinity App or xFi website, select the device you want to provide access to, and follow the instructions to allow access.
Alternatively, you can choose to turn off Advanced Security.
Accessing a NETGEAR Router
To unblock a URL in NETGEAR Armor:
- Launch the Nighthawk app from a mobile device that is connected to your router’s network.
- Tap Security. The NETGEAR Armor dashboard will display.
- Tap the Threats Blocked card. A list of suspicious blocked URLs will display.
- Tap on the URL that you want to unblock. Helpful information about why Armor blocked this URL will display.
- Tap Unblock URL. A warning will display.
- Tap OK. The unblocked URL will display under Unblocked.
To accept the changes router must be power cycled after URL is unblocked.
Issue: High Amp Draw alert message.
Probable Cause: Debris has gotten into the pump, forcing the pump to work harder.
Resolution: Inspect for and remove any debris within the pump.
-OR-
Probable Cause: Check valve is not functioning properly or contains buildup.
Resolution: Remove the check valve to ensure proper function and inspect for buildup. Clean or replace the check valve as needed.
Issue: Loss of WiFi Connection or unable to connect to WiFi
Probable Cause: WiFi signal strength is too weak.
Resolution: Move the router or use a WiFi extender to strengthen the WiFi connection.
Issue: LED lights are flashing every 10 seconds from red to green and the back-up pump is running.
Probable Cause: The WiFi set up button was held longer than 3 seconds.
Resolution: Power cycle the WiFi controller by disconnecting from AC power and removing the RED lead from the battery. Wait 90 seconds, and reconnect the controller to the battery and AC power. The unit may need to be reconnected to WiFi.

